Showing posts with label Food. Show all posts

Monday, February 23, 2015

Coconut Butterscotch Cookies

Growing up, more often than not, Sunday evenings were for watching AFV and making cookies as a family. (I'm 99.9% sure my mom took on the brunt of the work and was the one that actually made the cookies and cleaned it all up. Thanks, Mom!) Our arsenal of cookie recipes contained 3 fail-proof recipes bound to satisfy a greater percentage of the 7 (yes, 7!) of us: No-Bake Cookies, classic Chocolate Chip Cookies, and Oatmeal "Scotchies."

While I was home this past New Year's, we decided to make our favorite Oatmeal "Scotchies" and mix it up a bit by adding some shredded coconut. I'm of the opinion that coconut can make anything better. Hot chocolate, cookies, Hawaiian Haystacks, life in general. (I also believe that cinnamon can do the same thing, but that deserves it's own post one day.) If you love Butterscotch Oatmeal Cookies, I can promise you that they're even better with this addition!

Ingredients:
1 1/4 c. flour
1 t. baking soda
1/2 t. salt
1/2 t. cinnamon
1 c. butter
3/4 c. sugar
3/4 c. packed brown sugar
2 large eggs
1 t. vanilla
3 c. quick or old-fashioned oats
1/2 c. shredded coconut
1 1/2 - 2 c. butterscotch chips 

Directions:
1. Preheat oven to 350 degrees.
2. Beat butter, sugar, brown sugar, eggs, and vanilla in a large mixing bowl. 
3. Add flour, baking soda, salt, and cinnamon. Mix until combined.
4. Add oats, coconut, and butterscotch chips and mix by hand.
5. Drop by spoonful onto baking sheet. Bake for 8-9 minutes.
6. Let cookies cool on the baking sheet for 2 minutes and then transfer them to a wire cooling rack.

Enjoy!

Recipe adapted from Nestle.

Monday, February 16, 2015

Coconut Crack Bars

If you've been to this corner of the internet before, you've probably realized that I'm all about things being easy and not taking a lot of time. Easy crafts, easy makeup tips, easy recipes, etc. Well, my friends, I can promise you that this is one of the easiest treats you could ever make - 5 ingredients and no baking! If you're a big fan of coconut, like myself, you will be over the moon for this treat. My coworker brought in these bars to share a few weeks ago and I immediately asked her for the recipe. . .they're that good!

Ingredients:
1 c. unsweetened shredded coconut
1/4 c. agave
2 T. coconut oil
1/2 t. vanilla
1/8 t. salt

Directions:
1. Combine all ingredients in a medium bowl.
2. Scoop mixture into a small container and smooth it out evenly.
3. Refrigerate for an hour before cutting squares.

Note: I microwaved some peanut butter and chocolate together and drizzled it on top of the bars. I'd highly recommend it!

Enjoy!

-----------------------------------
Linking up over here:

Monday, January 12, 2015

M&M Cookies

Around the time that I left home for college, I ended up with a cookbook from my grandma. It was one of those homemade cookbooks that all of the ladies from church contribute to and share their favorite recipes. As a 17-year old, I didn't think much about it since I was planning on moving into the dorms on campus my first year and wouldn't be cooking my own meals. The cookbook was packed up and never used. 

Fast forward 4 1/2 years and you'd find me cleaning out my kitchen and coming across this cookbook from my grandma. I pulled it off the shelf and immediately placed it in my Goodwill pile since I had never used it, let alone opened it up. A few minutes later, I walked by the pile again and saw the discarded cookbook. I picked it up and started thumbing through the recipes, noticing that quite a few looked fabulous and I serendipitously turned to this M&M cookies recipe. Well, it's settled then, I thought. I had to keep the cookbook. For the past few weeks, I've had fun pulling out the book and making some of the recipes, and I love that it reminds me of my grandma each time! Without further ado, here's a truly fabulous M&M cookie recipe from a Mrs. Thelma Johnson.
Ingredients:
1 c. packed brown sugar
1/2 c. white sugar
1 c. butter
2 eggs
1 1/2 t. vanilla
2 1/2 c. flour
1 t. baking soda
1 t. salt
1 1/2 c. M&M's

Directions:
1. In a large bowl, mix sugar, eggs, butter, and vanilla thoroughly. Add flour, salt, and baking soda to creamed mixture. Blend well. Add 3/4 cup of M&M candies.
2. Drop dough by teaspoonful onto cookie sheet and bake at 350 degrees F for 9 to 11 minutes.
3. Once you've removed the cookie sheet from the oven, slightly push a few M&M candies on top of each cookie.
---------------------------------------------
Linking up over here today:

Wednesday, December 17, 2014

3 Ingredient Fudge

fudge, Christmas treat, chocolate, candy cane, treat, sugar
So, not to brag or anything, but I think I made some pretty great fudge last night. I was shocked. Normally my chocolate seizes (becomes a hard and crumbly mess) whenever I try to melt it, so needless to say, I did a happy dance when I did not ruin my chocolate and the fudge turned out beautifully. Plus, fudge. So why not do a happy dance?

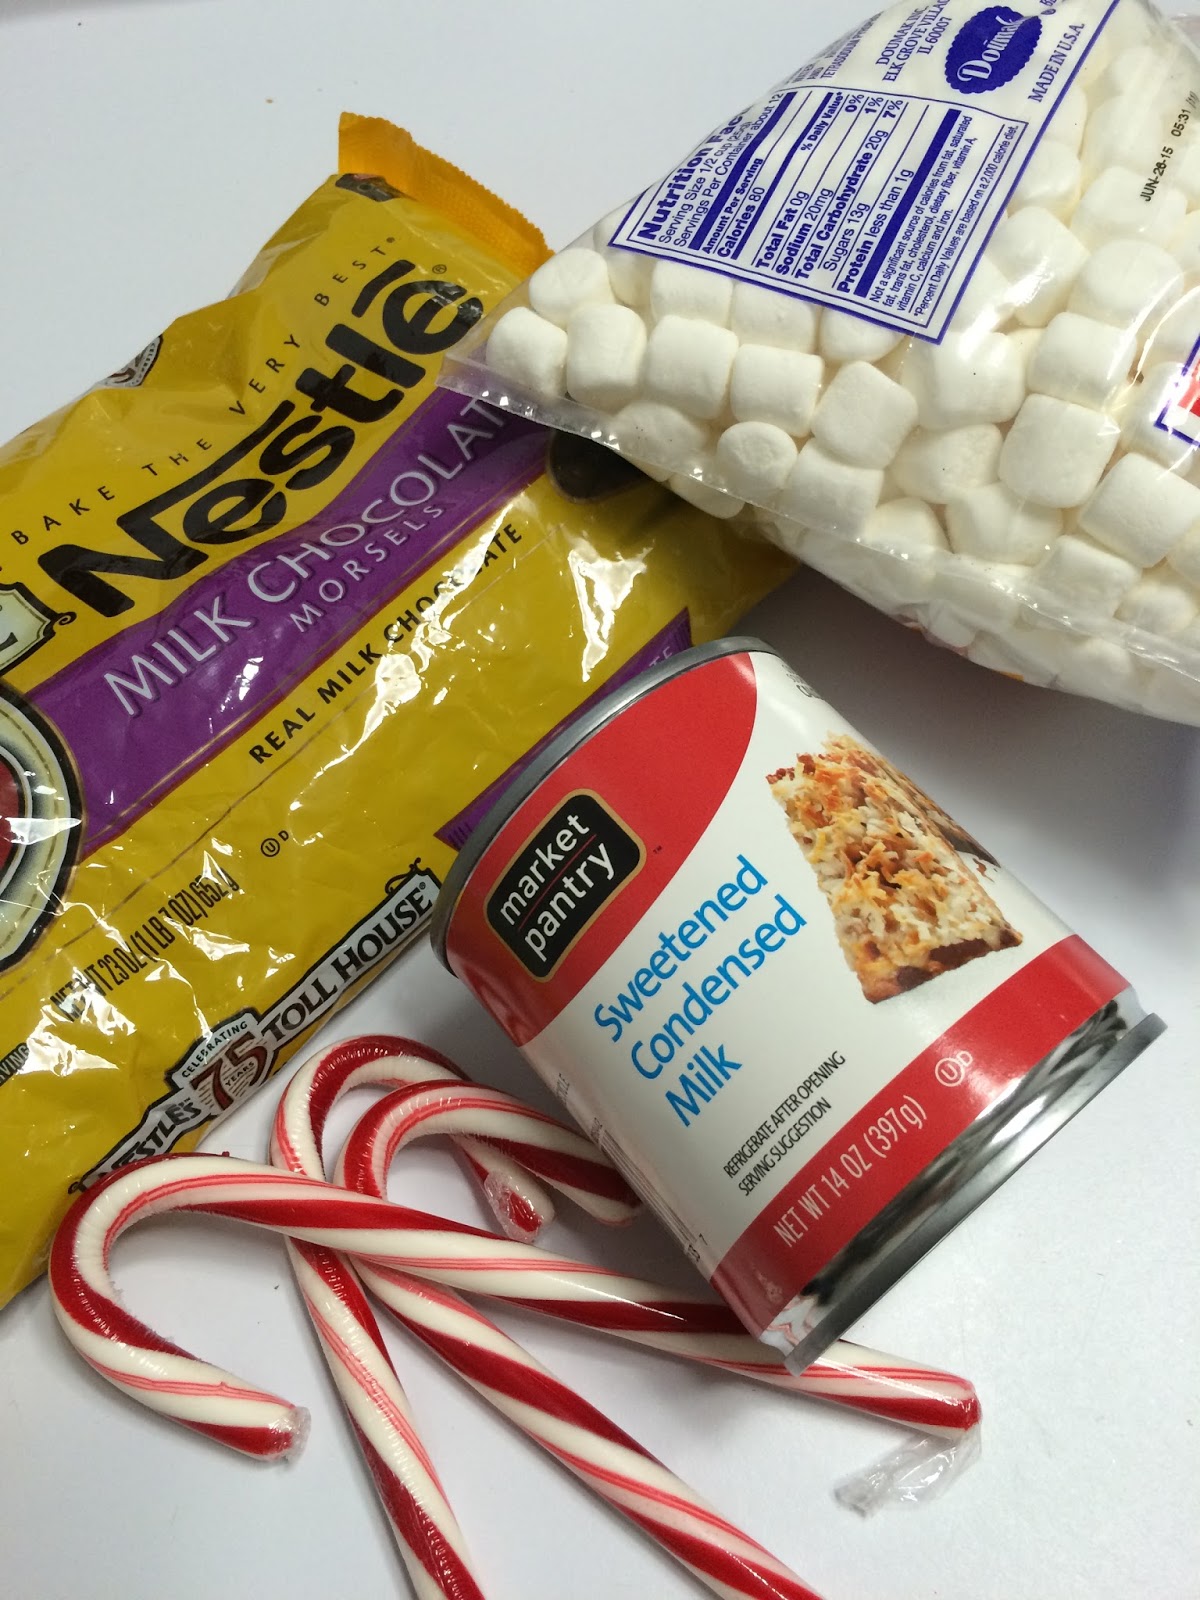
The best thing about this fudge is that it requires only 3 ingredients, but you can add anything else you'd like to it.  You'll need 3 cups of chocolate chips, 1 can of sweetened condensed milk, and 2 cups of marshmallows.
First things first, place a sheet of parchment paper in a small 8x8 or 9x9 pan.
Second, combine the sweetened condensed milk, chocolate chips, and marshmallows in a stove top pan and turn heat on low. (I turned the nob on my stove to 2 1/2-3.)
Third, stir your mixture constantly so the chocolate won't seize. It took about 5 minutes for everything to melt and combine, but my Christmas music playing in the background kept me sane. ;)
 Fourth, I poured the chocolate mixture into my pan and spread it into each corner. I then threw some candy canes in my food processor and sprinkled the pieces on top. (You could use nuts, toasted coconut, toffee pieces, other candy, etc.)
Fifth, after letting the pan sit in the fridge for an hour, I pulled it out and cut the fudge into pieces. I found that it's much easier to lift the parchment paper out of the pan before cutting it. :)
Lastly, share that kick-A fudge with everyone and anyone you know! Nothing says "Happy Holidays!" like a heavenly piece of fudge.

Ingredients:
3 c. chocolate chips
1 (14 oz.) can of sweetened condensed milk
2 c. mini marshmallows
2 crushed candy canes, or other desired topping

Directions:
1. Place a sheet of parchment paper in an 8x8 or 9x9 pan.
2. Combine the sweetened condensed milk, chocolate chips, and marshmallows in a stove top pan and turn heat on low. (I turned the nob on my stove to 2.5/3)
3. Stir your mixture constantly until everything is melted.
4. Pour the fudge into the pan and spread it into each corner. Before it starts to cool, sprinkle on your desired topping.
5. Let the fudge chill in the fridge for an hour. Cut into pieces and enjoy!
-----------------------------------
Linking up over here today:

Monday, November 24, 2014

Pie Month: Berry Pie

A Peachy Keen Pie Month: Berry Pie

As far as I'm concerned, desserts are meant to be chocolatey and fruits are meant to be fruity (except for chocolate oranges, which may be the best Christmas candy). But I can make a few exceptions in the fruity desserts department, and berry pie happens to be one of them. Having this at the holiday table adds bright summertime flavor to the Thanksgiving roster.

A Peachy Keen Pie Month: Berry Pie

Originally I intended to freeze this pie raw and pop it in the oven come Thanksgiving Eve (my mother says pies are always better if you let them sit over night). But I opened the fridge this morning and the pie was sitting on the shelf begging to be baked. And baked it was. 

Filling Ingredients*

1 c. sugar
1/4 c. corn starch
1/3 c. water
pinch of salt
1 tbs lemon juice
3-4 cups frozen berries (I went the strawberry/blueberry/blackberry/raspberry route)


*Note on crust recipe: my family gets together once a year to make a million and a half pies. The dough is created by mixing 5 lbs of flour, 3 lbs of shortening, and 24 oz of lemon lime soda. Makes 17 crusts. Easiest things in the world, tastes fabulous. 


Directions

Mix the sugar, cornstarch, water, and salt together in a saucepan on medium heat until it begins to boil. Allow to thicken for about 2-3 minutes and remove from stove. Let it cool down.

If there is any excess liquid in your frozen berries, drain it out. Fold berries and lemon juice into the sugar mixture. 

Dump into pie crust, cover with crust, dab with butter. Bake at 400 degrees for 10 minues. Lower the temperature to 350 for another 40 minutes. 

Recipe modified from this one here. 

Monday, November 17, 2014

Pie Month: Easy Chocolate Pie

A Peachy Keen Pie Month: Easy Chocolate Pie
Well, here we are three weeks into November (and our Pie Month series!) and Thanksgiving will be here before we know it! Have you started planning out your big feast? I haven't, but I do know what pies I'll be making. ;)

In high school, I had a friend whose mom always had this chocolate pie in their fridge. In fact, she'd make 2 or 3 of them at a time because so many teenagers would come over and want to partake of the deliciousness. And probably also because it was ridiculously easy. I have great memories of sitting around their table, chatting with friends, and eating pie. 

Ingredients:
1 pre-made chocolate pie crust
4 Hershey's chocolate bars
1 tub of Cool Whip, thawed

Directions:
1. Melt the chocolate bars (microwave or stovetop) and mix into the Cool Whip.
2. Pour into the crust and refrigerate for 4+ hours.

I sprinkled some Heath bits on top of this one, but you could top with more Cool Whip, crushed Oreos, any other candy bar pieces, or shaved chocolate.

Enjoy!

Monday, November 10, 2014

Pie Month: Pumpkin Cream Cheese Pie

A Peachy Keen Pie Month: Pumpkin Cream Cheese Pie
I just want to preface this post by saying I wasn't a huge pumpkin pie fan before, but this recipe has made me rethink my ways. I'm basically converted to the pumpkin pie side. (What is the other side? Pies with fruit? I just don't know.)

Ever been to a family gathering where everyone gushes over grandma's famous baked beans, Aunt Susan's homemade rolls, or Uncle David's hamburgers? Yeah? Same here. Only foods of the highest caliber are deserving of the praise and I can promise you that this pumpkin cream cheese pie is indeed worthy of being served to your extended family. They'll be singing Pumpkin Cream Cheese Pie praises in no time.

Do your stomach family and friends a big favor and whip up this gem for Thanksgiving dinner.
PUMPKIN CREAM CHEESE PIE

Ingredients:
1 unbaked deep-dish pie shell (9-inch is average, I believe)
6 oz cream cheese, softened
3/4 c light corn syrup, divided
1/2 t vanilla extract
1 c canned pumpkin
1/2 c evaporated milk
2 large eggs, slightly beaten
1/4 c granulated sugar
2 t cinnamon, divided
1/2 t nutmeg
1/4 t salt

Directions:
1. Preheat oven to 325 degrees F.
2. Beat cream cheese in a small bowl until light and fluffy. Gradually add 1/2 c corn syrup, vanilla, and 1/2 t cinnamon.
3. Combine pumpkin, evaporated milk, eggs, 1/4 c corn syrup, sugar, 1 1/2 t cinnamon, nutmeg, and salt in a medium bowl.
4. Pour pumpkin mixture into pie shell.
5. Drop cream cheese mixture by spoonfuls onto pumpkin filling. Swirl mixture with a spoon, pulling pumpkin mixture up to the surface.
6. Bake for 50-60 minutes or until a toothpick inserted near the center comes out clean. Cool completely and serve with whipped cream!

Monday, November 3, 2014

Pie Month: Candy Bar Pie

A Peachy Keen Pie Month: Candy Bar Pie

Earlier this week, the weather man called for snow. On the one hand, I am currently garage-less and the thought of scraping thick layers of frost off of my early morning windshield makes me want to cry. On the other hand, snow tends to mean Christmas is coming. I'll do anything for Christmas. 

The snow didn't come. But it's been cold, man. Cold and wet and the last of the autumn leaves are fluttering off of the trees and sticking to everything. November has its bright spots, though. Thanksgiving will be here in a few weeks. That means PIE SEASON, people. In preparation, I've been practicing my pathetic pastry skills. 

I snatched this particular recipe from a local morning show that I watched during a bout of mono in high school and have kept it ever since. It is the best kind of pie because it requires 1) no actual baking involved and 2) lots of chocolate.


CANDY BAR PIE RECIPE

Ingredients: 
-1/2 cup of milk
-Half a bag of big marshmallows
-5 to 6 Hershey candy bars. (I prefer the ones with almonds for texture. Also, the grocery store was selling it's Halloween sugary things for 1/2 off, so I substituted about half a bag of the fun-sized stuff.)
-Whipped cream
-Graham cracker pie crust. Mine is store bought. 

Directions: 

1. Throw your milk and marshmallows in a pan over the stove until the marshmallows have all melted down and are thoroughly mixed in. 
2. Throw your candy bars in until they are melted down and mixed in. Stir a lot or burning will happen.
3. Take the pan off of the burner and fold in 1 cup of whipped cream. 
4. Pour it into your crust. Let it set up in the freezer for a couple of hours.
5. After it's chilled to your desired consistency, spread the rest of the whipped cream over top. Sometimes I use a star tip and a piping bag for this if I need it to look semi-fancy. 


Thursday, October 30, 2014

Halloween Lunch Idea

Peachy Keen Blog: Halloween Lunch Ideas - Food is always more fun when it's holiday shaped!
To be perfectly honest with you guys, I was at work yesterday and noticed that the clementine next to my keyboard looked just like a mini pumpkin. So I did what any self-respecting person would do and grabbed my Sharpie marker to give it the face it needed. Yes, needed. :)

I brought the clementine home with me and decided to put together a little Halloween sack lunch for my husband. I made a PB&J, pulled out my handy dandy pumpkin cookie cutter, and went to town making that sandwich festive.* I hunted in the cupboards for some little candies, retrieved a milk glass bottle and a Halloween paper straw from my collection (more on that later), and ransacked the kitchen for a brown paper bag. When everything had been gathered and put together, I stole a few candies to eat and that was that. So simple. So cute.

Basically what I'm saying is that you should probably throw together a festive meal (or maybe you already have!), and share your ideas with me. Next time I'm thinking little mandarin orange cup with a pumpkin face drawn on the plastic top.

Quick, someone find me a 5-year old so I can put together festive sack lunches for them every day instead of embarrassing my husband at work. 

 *there's another whole PB&J and clementine not pictured that also went into his lunch - he doesn't starve, I promise!

Saturday, October 25, 2014

Halloween Cupcakes


White Cupcakes
4 egg whites
2 c. all-purpose flour
1 t. baking powder
1/2 t. baking soda
1/2 t. salt
1/2 c. butter or shortening, softened
1 3/4 c. sugar
1 t. vanilla
1 1/3 c. buttermilk

1. Allow egg whites to stand at room temperature for 30 minutes. Meanwhile, grease twenty-four 2 1/2-inch muffin cups or line with paper bake cups. Set pan(s) aside. In a medium bowl stir together flour, baking powder, baking soda, and salt; set aside.

2. Preheat oven to 350*F. In large mixing bowl beat butter with an electric mixer on medium to high speed for 30 seconds. Add sugar and vanilla; beat until well combined. Add egg whites one at a time, beating well after each addition. Alternately add flour mixture and buttermilk to butter mixture, beating on low speed after each addition just until combined. Fill muffin cups halfway.

3. Bake for 12-15 minutes, or until a wooden toothpick inserted near center(s) come out clean. Let cupcakes sit for a minute or two before transferring them to a wire cooling rack. Cool thoroughly.


Orange Frosting
1 c. butter (2 sticks)
4 c. powdered sugar
2 T. milk
1 T. vanilla
1/8 t. almond extract
5 drops of orange food coloring

1. Mix all of the ingredients on medium speed until thoroughly combined. 

Enjoy!


Cupcake liners: Walmart
Cocktail sticks: Target

Friday, October 24, 2014

Peanut Butter Pumpkins


Chocolate Peanut Butter Pumpkins

Today ended in me hunched next to a pokey shrub outside of a dark and rickety apartment building: the victim of the classic girl-locks-keys-in-car. It's nearly November now, which means that the night was chilly and spooky, and I tried to busy myself with mobile games of Boggle instead of thinking about how I was pretty sure I  had just seen a werewolf/creeper/ghost lurking in the tree thicket across the street. My super hero husband rescued me. Few phone calls will make you feel more sheepish than requesting your loved one drive out thirty minutes to bring you a spare for the third time that season. That is probably the definition of sheepish.

My point is that chocolate solves things like bad nights. Especially when molded into holiday shapes and filled with your mama's delicious peanut butter mixture. So here is a recipe for you: bring it to parties or stash it in your fridge for nights like tonight.

Ingredients for Peanut Butter Pumpkins Gluten Free Graham Crackers

This is one of those secret family recipes that you blame for holiday weight gain. Traditionally, my mother (I want to point out her name is Candy, so clearly she would make the best candy) uses this filling for peanut butter eggs at Easter. But who wants to wait until spring.

Five ingredients: powdered sugar, creamy peanut butter, butter, chocolate chips, and graham crackers. The Celiac train is still in town over here, so we get to use gluten free everything. Buy the real thing if you can. (But, Kinnikinnick is pretty fabulous, especially their pizza crusts.)

Mix Ingredients

Everything but the chocolate chips goes in a bowl together.

Gluten Free Graham Mixture

Mix it up. You can try to use a spoon at first, but eventually you will realize that you need to get your hands in there.

Wilton Chocolate Pan
.
This great little pan was snatched from my parents' extensive Wilton collection. Most craft stores will sell this and other plastic/metal pumpkin molds this time of year. Melt your chocolate chips down and coat the pan. Let it and the batter set in the fridge for a little bit.

When both things have set up, pack the peanut butter filling into the mold. Then just smooth a little bit of melted chocolate over the top to finish it off. Be messy.

Peanut Butter Halloween Treat


At least make the filling to snack on. Just as good as cookie dough, I swear. Here's the (edited) recipe as written in my family cookbook: 

Ingredients: 
-1-3/4 c. powdered sugar
-1/2 c. graham cracker crumbs
-1 stick margarine
-1/2 c. peanut butter
melted chocolate

Mix & knead first four ingredients. Coat pan with chocolate. Chill chocolate pan & filling. Mold filling into pan, cover in chocolate, chill again . Eat. 


Wednesday, July 16, 2014

Easy Baked Cheesecake and Fruit Sauce


Easy Baked Cheesecake
1 pre-made graham cracker pie crust
2 packages (8 oz. each) cream cheese
2/3 c. sugar
1 t. vanilla
3 eggs

1. Heat oven to 325*F. 
2. Beat cream cheese, sugar, and vanilla with mixer until blended.
3. Add eggs, 1 at a time, mixing on low after each until just blended.
4. Pour over mixture over graham cracker pie crust.
5. Bake 45 minutes or until center is done. Cool completely and refrigerate 4 hours.


Homemade Fruit Sauce
1 c. strawberries (fresh or frozen)
1 1/2 c. raspberries (fresh or frozen)
1/2 c. water
1 t. cornstarch
1/2 c. brown sugar
1 t. lemon juice

1. Mix cornstarch into water and add to a small saucepan. Turn heat to medium-high.
2. Add all other ingredients to the saucepan.
3. Whisk together and bring to a boil.
4. Stir and remove from heat.  Let cool.

Friday, June 27, 2014

Almond Chocolate Cupcakes

On Father's Day, our church had a little dessert potluck for all of the men, and I was asked to bring a treat to share. I figured there would be a good number of mouths to feed so I decided to whip up some mini cupcakes. You definitely can't go wrong with classic chocolate cupcakes and chocolate frosting, but the almond extract in both really took them to the next level. Don't forget to sprinkle some mini chocolate chips, sprinkles, crushed candy bar, or maybe even some caramel on top! Enjoy!

Chocolate Cake
3/4 c. butter
3 eggs
2 c. all-purpose flour
3/4 c. unsweetened cocoa powder
1 t. baking soda
3/4 t. baking powder
1/2 t. salt
2 c. sugar
2 t. vanilla
1 t. almond extract
1 1/2 c. milk

1. Allow butter and eggs to stand at room temperature for 30 minutes. Grease twenty-four 2 1/2-inch muffin cups or line with paper bake cups. (I chose to primarily make mini cupcakes and ended up with 60, as well as 12 regular sized ones.) Set pan(s) aside. In a medium bowl stir together flour, cocoa powder, baking soda, baking powder, and salt; set aside.

2. Preheat oven to 350*F. In a large mixing bowl beat butter with an electric mixer on medium to high speed for 30 seconds. Gradually add sugar while beating on medium speed until well combined. Scrape sides of bowl; beat 2 minutes. Add eggs one at a time, beating after each addition. Beat in vanilla and almond extract. Alternately add flour mixture and milk to butter mixture, beating on low speed after each addition just until combined. Beat on medium to high speed for 20 seconds more. Spread into prepared pan(s).

3. Bake for 12-15 minutes, or until a wooden toothpick inserted near center(s) come out clean. Let cupcakes sit for a minute or two before transferring them to a wire cooling rack.  Cool thoroughly.


Almond Fudge Frosting
2 pounds powdered sugar (about 8 cups)
1 c. unsweetened cocoa powder
1 c. butter, softened
2/3 c. boiling water
2 t. vanilla
1 t. almond extract

1. In a large mixing bowl combine powdered sugar and cocoa powder. Add butter, boiling water, vanilla, and almond extract. Beat with an electric mixer on low speed until combined. Beat 1 minute on medium speed. If necessary, cool 20 minutes or until mixture reaches spreading consistency. Or if frosting is too thick, add boiling water, 1 tablespoon at a time, until frosting reaches spreading consistency.  Frost away!


Both recipes adapted from Better Homes and Garden New Cook Book.